Managing form submissions on your WordPress site can be challenging if you’re not aware of when someone fills out a form. Whether it’s a contact form, a subscription sign-up, or feedback, Elementor simplifies the process of creating forms. However, it’s just as important to ensure you receive notifications for these submissions. Imagine missing out on valuable leads or crucial customer inquiries simply because notifications weren’t properly set up! In this guide, we’ll walk you through the steps to configure your Elementor forms so that you get instant notifications every time a form is submitted, helping you keep track of your communications and never overlook a submission.
Setting Up a Form in Elementor
Creating a form in Elementor is a simple process that helps you collect essential information from your website visitors. Here’s how to set up your form:
Step 1: Access Elementor and Choose a Page
Begin by logging into your WordPress dashboard and choosing the page where you want to place the form. Click on the “Edit with Elementor” button to enter the Elementor editor, where you can design and personalize your page.
Step 2: Add the Form Widget
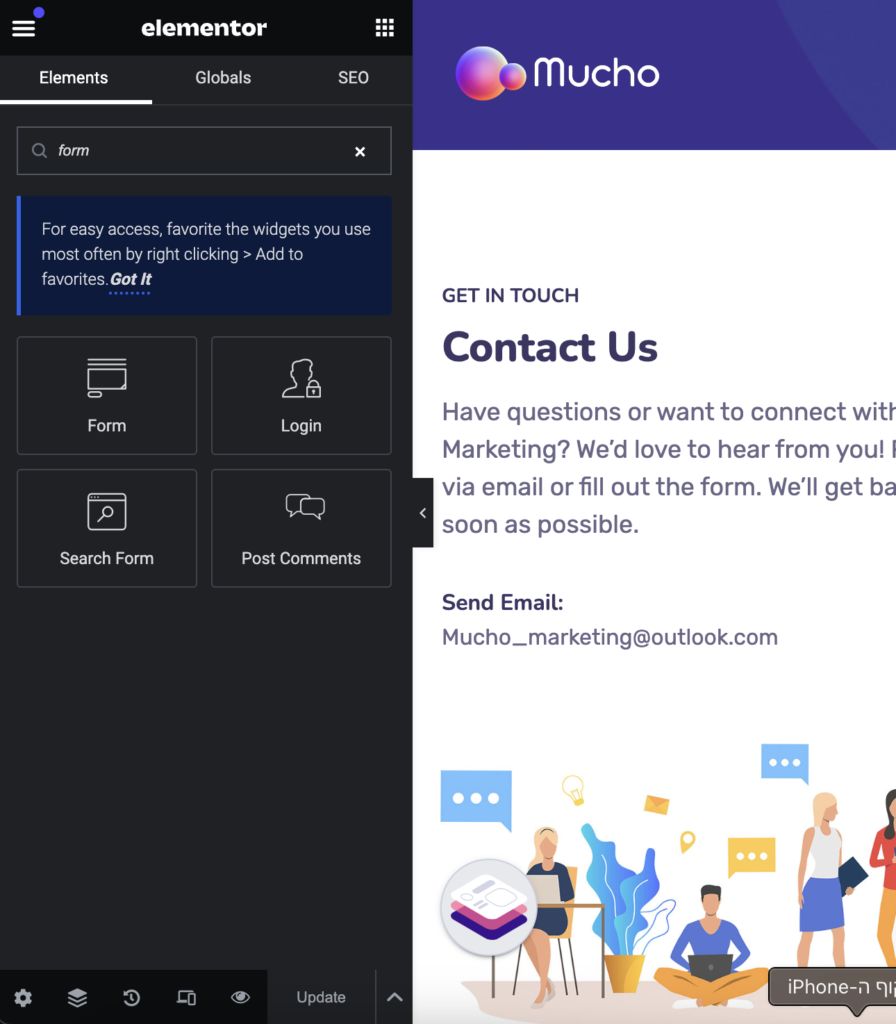
In the Elementor editor, locate the Form widget. You can either type “Form” in the search bar or browse through the widget panel on the left. Drag and drop the Form widget into the section of your choice on the page.
Step 3: Customize Form Fields
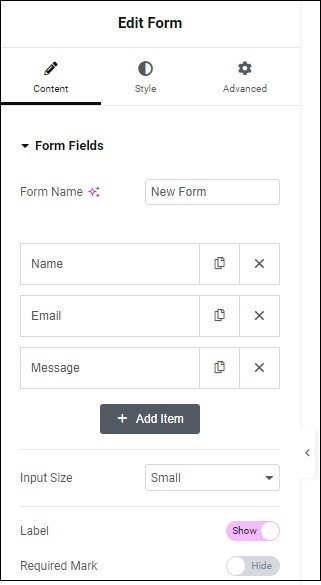
After placing the form on your page, you can tailor it by adding the necessary fields. Typically, forms include basic fields like Name, Email, and Message. Elementor makes it easy to add, remove, or modify these fields. Click on any field to change the label, placeholder text, and field type (like text, email, or text area).
Step 4: Configure Additional Form Settings
Elementor gives you the flexibility to adjust your form’s settings according to your preferences. You can change the button text, modify the form’s look, and even establish validation rules for each field, like requiring an email address or marking a field as mandatory. Take a moment to tweak these settings to fit your needs.
Step 5: Save the Form
Once you’ve configured your form, click the Update button to save your changes. Your form will now be active on your page and ready to gather submissions from users.
With your form set up in Elementor, you’re all set to adjust the notification settings, making sure you receive an email each time someone submits the form.
Configuring Notification Settings
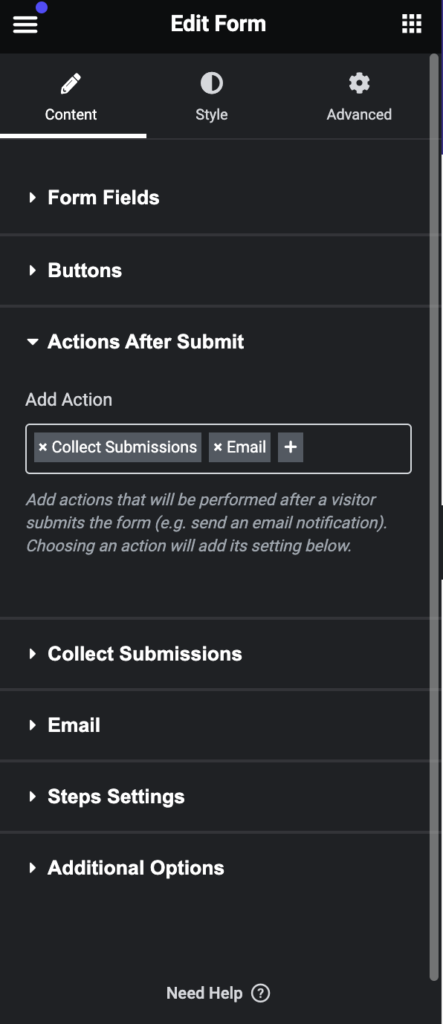
After setting up your form in Elementor, the next step is to make sure you get an email notification each time someone submits it. Elementor makes this easy with the Actions After Submit feature. Start by clicking on the form in the Elementor editor, then look at the panel on the left. In the Actions After Submit section, click the “+” icon to add a new action. Choose Email from the dropdown menu, which will enable Elementor to send you an email notification whenever the form is submitted.
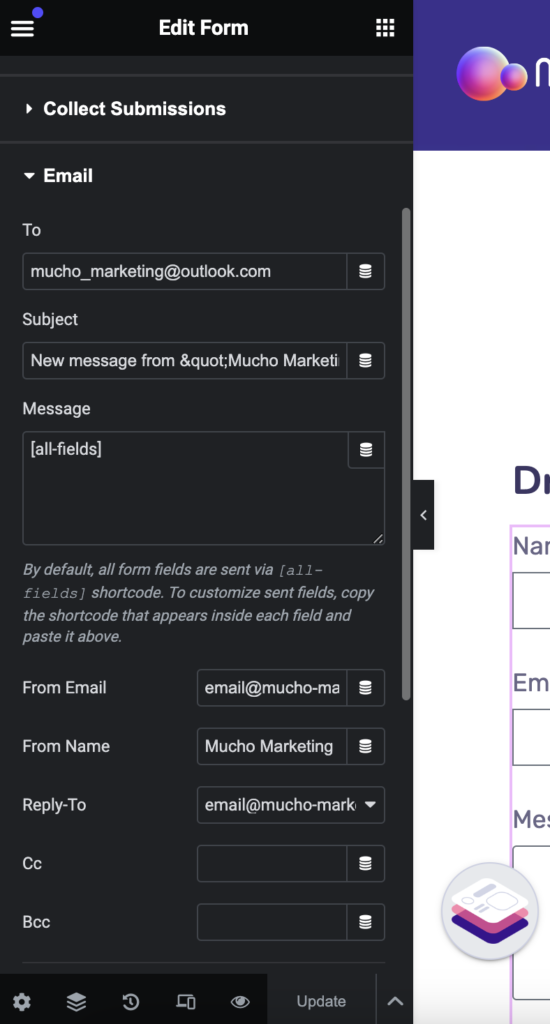
With the email action activated, it’s time to customize the notification settings to fit your needs. In the Email Settings tab, you can fill in key details like the recipient’s email address, subject line, and message body. For example, in the To field, enter the email address where you want to receive notifications. This could be your business email or any address you check frequently. It’s also a good idea to personalize the subject line to something recognizable, such as “New Form Submission from [Your Website Name],” so you can easily spot these notifications in your inbox.
In the Message section, you can further tailor the content of the email notification. Elementor allows you to use dynamic tags to automatically include form data in the email, like the submitter’s name, email, or message. This way, you’ll have all the essential information in the notification email without needing to log into your WordPress dashboard. Once you’re happy with the setup, click Update to save your changes. Your form is now ready to send email notifications for every submission, keeping you updated in real time.
Testing the Notification System
After setting up the notification settings in Elementor, it’s important to test the system to make sure everything is functioning correctly. Start by opening the page where you’ve added your form and fill in the required fields as a visitor would. Input a name, email address, and any other details included in your form. Once you’ve filled out the fields, click the Submit button to send the test form.
Right after submitting, check the inbox of the email address you provided in the Email settings. You should receive a notification with the details of the form submission. Make sure the email has the correct subject line, accurately displays all the submitted information, and is sent to the right recipient. If everything appears to be in order, the form is working correctly, and you’ll receive notifications each time someone submits it.

If you don’t receive the email notification, there are a few troubleshooting steps to consider. First, verify that you’ve entered the correct email address in the To field. Also, check your spam or junk folder, as emails can sometimes be misdirected there. If the issue continues, you may need to review your server’s email configuration or consider using an SMTP plugin to enhance email delivery. Testing is essential to ensure you won’t miss any important form submissions.
Best Practices for Email Notifications
Setting up email notifications in Elementor is just the beginning; making sure those notifications are delivered consistently is equally crucial. First, always use a valid and reputable email address for both the From and To fields in your form settings. For the From address, it’s advisable to use an email link to your website’s domain (like info@yourdomain.com), as this enhances deliverability and minimizes the risk of your notifications ending up in spam folders. Steer clear of free email services such as Gmail or Yahoo, as they can trigger spam filters.
Another effective practice is to include all pertinent form submission details in the email body. With Elementor’s dynamic tags, you can automatically insert data from the form fields into the notification email. This guarantees that each notification includes complete information without the need for you to manually check the submissions in the WordPress dashboard. Moreover, if several individuals need to be informed about form submissions, you can easily add multiple email addresses separated by commas in the To field.
Lastly, it’s wise to test the notification system regularly, especially after making any adjustments to your form or email settings. This ensures everything is working as it should. If you encounter deliverability problems, consider using an SMTP (Simple Mail Transfer Protocol) plugin, which sends your website’s emails through a dedicated server, decreasing the chances of email issues. Following these best practices will help you maintain effective communication, ensuring that no submission goes unnoticed and that your emails are delivered promptly and reliably.
FAQs
1. Why am I not receiving email notifications from my Elementor form?
If you’re not receiving notifications, start by checking the email address you entered in the To field of the form’s email action. Make sure it’s correct and not landing in your spam or junk folder. If the problem continues, you might want to consider using an SMTP plugin to enhance email deliverability, as some hosting servers can block emails sent from WordPress.
2. Can I send form notifications to multiple email addresses?
Yes, you can send notifications to several recipients. In the To field of the email settings, just enter each email address separated by commas. This way, you can keep multiple team members updated about form submissions.
3. How do I customize the content of the email notification?
You can tailor the email content by using dynamic tags in the email settings. These tags automatically pull information from the form fields (like name, email, and message) into the notification email, ensuring you receive all the necessary details from each submission without having to edit the content manually.
Conclusion
Getting notifications for form submissions in Elementor is essential for effectively managing your website’s communication. By utilizing the Actions After Submit feature, you can make sure that each form submission sends an email alert, allowing you to stay informed in real-time. Elementor makes the whole process easy, from creating the form to setting up email notifications and testing the system. Adhering to best practices, like using valid email addresses and considering an SMTP plugin, will boost reliability even more. By following these steps, you’ll never overlook an important submission, ensuring your communication remains smooth and professional.

